
Sourdough bread has seen a resurgence in popularity thanks to its rich flavor, chewy texture, and the satisfaction of making it from scratch. Among the many sourdough recipes available, the Ballerina Farm sourdough bread recipe stands out for its simplicity and delicious results. In this comprehensive guide, we’ll walk you through a detailed, step-by-step approach to making your own version of this cherished recipe. Whether you’re a seasoned baker or a novice, you’ll find everything you need to know to bake a perfect loaf of sourdough bread.
What Makes Ballerina Farm Sourdough Special?
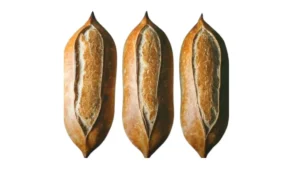
Ballerina Farm’s sourdough recipe is celebrated for its balanced flavor and perfect crust. The recipe leverages a mature sourdough starter and a straightforward method to create a loaf that’s both beautiful and delicious. Here’s why this recipe is a favorite:
- Authentic Flavor: The natural fermentation process gives sourdough its characteristic tangy taste.
- Crust and Crumb: It achieves a crispy crust and a soft, airy interior.
- Accessibility: With basic ingredients and a simple method, it’s approachable for bakers of all levels.
Ingredients for Ballerina Farm Sourdough Bread
To replicate the Ballerina Farm sourdough bread, you’ll need the following ingredients:
| Ingredient | Quantity | Notes |
| Active Starter | 250 g | Ensure it’s well-fed and bubbly |
| Bread Flour | 1000 g | Preferably high-protein for better texture |
| Sea Salt | 24 g | Adds flavor and controls fermentation |
| Water | 735 g | Plus 50 g after adding salt |
Equipment Required
Before you start baking, make sure you have the following equipment:
- Large or medium bowl
- Dutch Oven
- Oven
- Bread Basket
- Kitchen scale
Ballerina Farm Sourdough Bread Recipe Step-by-Step Instructions
1. Prepare the Dough
- Combine Starter and Water: In a large bowl, mix 250 g of active starter with 735 g of water. Use a kitchen scale to ensure accuracy.
- Add Bread Flour: Gradually incorporate 1000 g of bread flour into the mixture, stirring until fully combined.
- Mix in Sea Salt: Add 24 g of sea salt along with the remaining 50 g of water. Mix thoroughly.
- Rest and Develop Gluten: Cover the bowl with a damp kitchen towel and let it rest for 30 minutes. This rest period allows the flour to absorb the water and start gluten development.
2. Stretch and Fold
- Initial Stretch and Fold: Perform stretches and folds every 30 minutes for a total of 4-5 times. This technique helps in developing the dough’s structure.
- Rest at Room Temperature: After the final stretch and fold, let the dough rest at room temperature until it doubles in size. This could take several hours, depending on your environment.
3. Shape the Dough
- Divide and Shape: Transfer the dough onto a lightly floured surface. Divide it into two equal parts and shape each into a square.
- Create Tension: Roll each piece of dough up, creating tension by pushing and pulling it towards yourself. This process helps in achieving a well-formed loaf.
- Rest the Loaves: Place each loaf into a bread basket. Cover with plastic wrap and let them rest at room temperature for 30 minutes.
4. Refrigerate and Preheat
- Refrigerate: After the second rest, place the covered baskets in the refrigerator for 2 hours. This helps in developing the flavor.
- Preheat the Oven: About an hour before baking, preheat your oven to 500°F (260°C). Place the Dutch oven inside to preheat as well.
5. Bake the Bread
- Bake with Lid: Carefully transfer the loaves into the preheated Dutch oven. Bake with the lid on at 450°F (230°C) for 30 minutes.
- Finish Baking: Remove the lid and continue baking for an additional 15 minutes to achieve a golden-brown crust.
- Cool: Let the bread cool completely on a wire rack before slicing.
Substitutions and Variations
While the Ballerina Farm sourdough recipe is excellent as is, you can make some adjustments based on your preferences or ingredient availability:
- Bread Flour vs. All-Purpose Flour: Bread flour is preferred over all-purpose flour for its higher protein content, which gives the bread better texture and shape.
- Sourdough Discard: For this recipe, use an active starter. Sourdough discard isn’t suitable as it lacks the strength needed for proper rise.
How to Store Sourdough Bread
Proper storage is crucial to maintain the freshness of your sourdough bread:
- Room Temperature: Keep the bread at room temperature, avoiding refrigeration to prevent it from drying out.
- Cooling and Wrapping: Allow the bread to cool completely before covering it with plastic wrap or aluminum foil.
Baking Tips for Perfect Sourdough
- Color Check: Ensure the loaf is golden brown before removing it from the oven. If not, bake for an additional 5-10 minutes.
- Persistence Pays Off: Sourdough baking can be challenging. Don’t be discouraged if your first few loaves aren’t perfect. With practice, you’ll improve.
FAQs
What Type of Starter Should I Use?
Use an active, well-fed sourdough starter for the best results. It should be bubbly and at its peak when you begin.
How Long Should I Proof the Dough?
The dough should proof at room temperature until it doubles in size, which can take several hours depending on the ambient temperature.
Can I Use All-Purpose Flour Instead of Bread Flour?
Bread flour is recommended due to its higher protein content, which improves the texture and rise of the bread. However, you can use all-purpose flour if needed.
Why Is My Sourdough Bread Flat?
Flat bread may result from using inactive starter or insufficient dough handling. Ensure your starter is active and follow the stretch and fold steps carefully.
Conclusion
Mastering the Ballerina Farm sourdough bread recipe can be a rewarding endeavor, whether you’re a beginner or an experienced baker. By following these detailed steps and tips, you’ll be able to create a delicious loaf of sourdough bread with a perfect crust and tender crumb. Remember, practice makes perfect, so don’t be discouraged if your first attempts aren’t flawless. Keep refining your technique, and soon you’ll enjoy the satisfaction of baking beautiful sourdough bread at home. Happy baking!